A connection tells us how to talk to your chatbot during audits: through the chat widget on your website, its REST API, or an MCP server. No code changes are needed, and one test message confirms it works before you run a full audit.
Before you start
- You need the Owner, Admin or Manager role in the workspace to create or edit connections.
- Add your website first so tests can be built from its content. See Add your website.
- Each connection type is available on plans that include it: browser-based testing for the website widget, REST API integration, or MCP integration.
- Only connect chatbots you own or have permission to test.
Step by step
1. Open Chatbot connections
Click Chatbot connections in the left menu, then New connection, and pick a type:
- Browser Automation: test the live widget on your website, exactly as visitors see it.
- REST API: your chatbot exposes an HTTP API.
- MCP Server: your assistant is reachable through MCP tools.
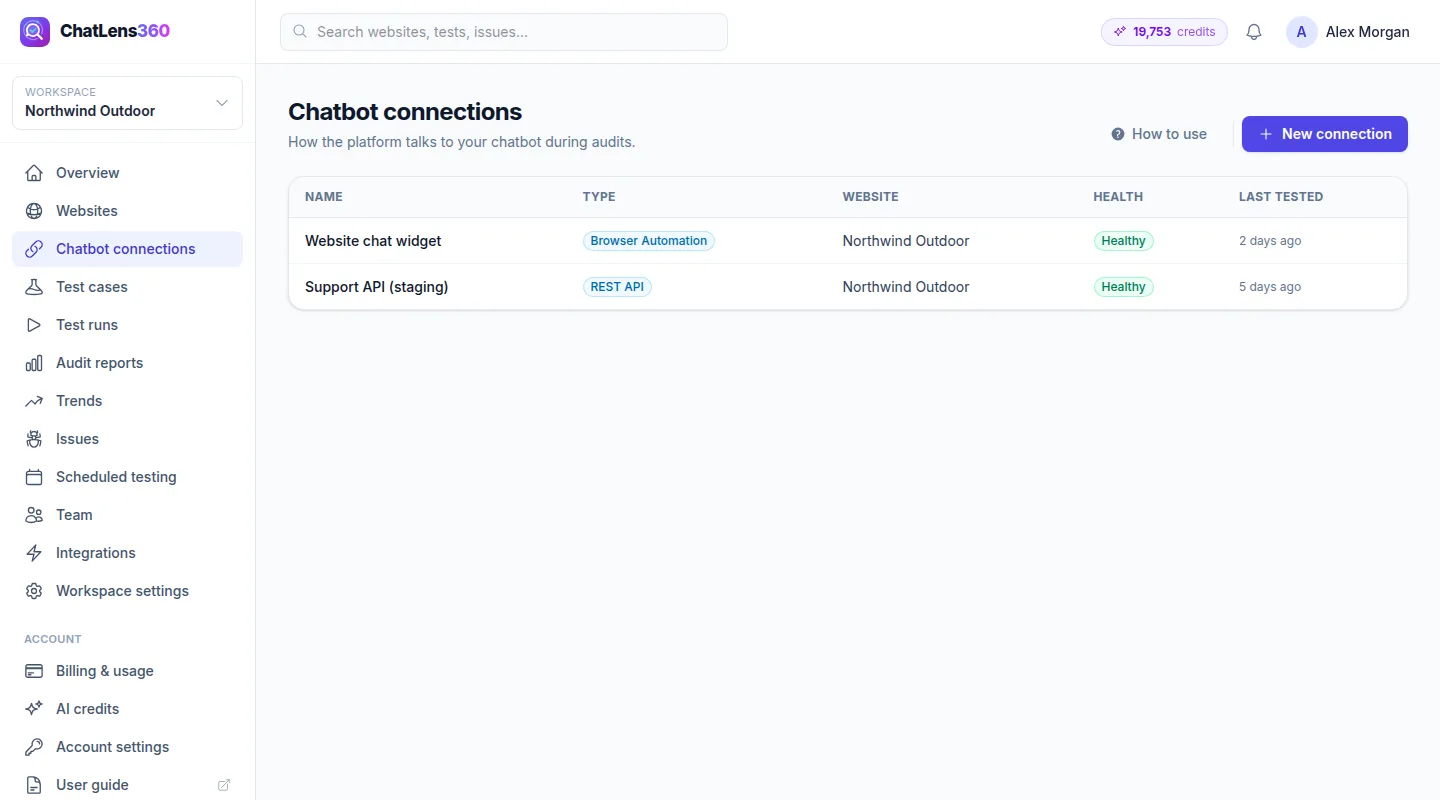
In every form, start with General: enter a Connection name and choose the Website this chatbot belongs to.
2. Option A: connect your website widget
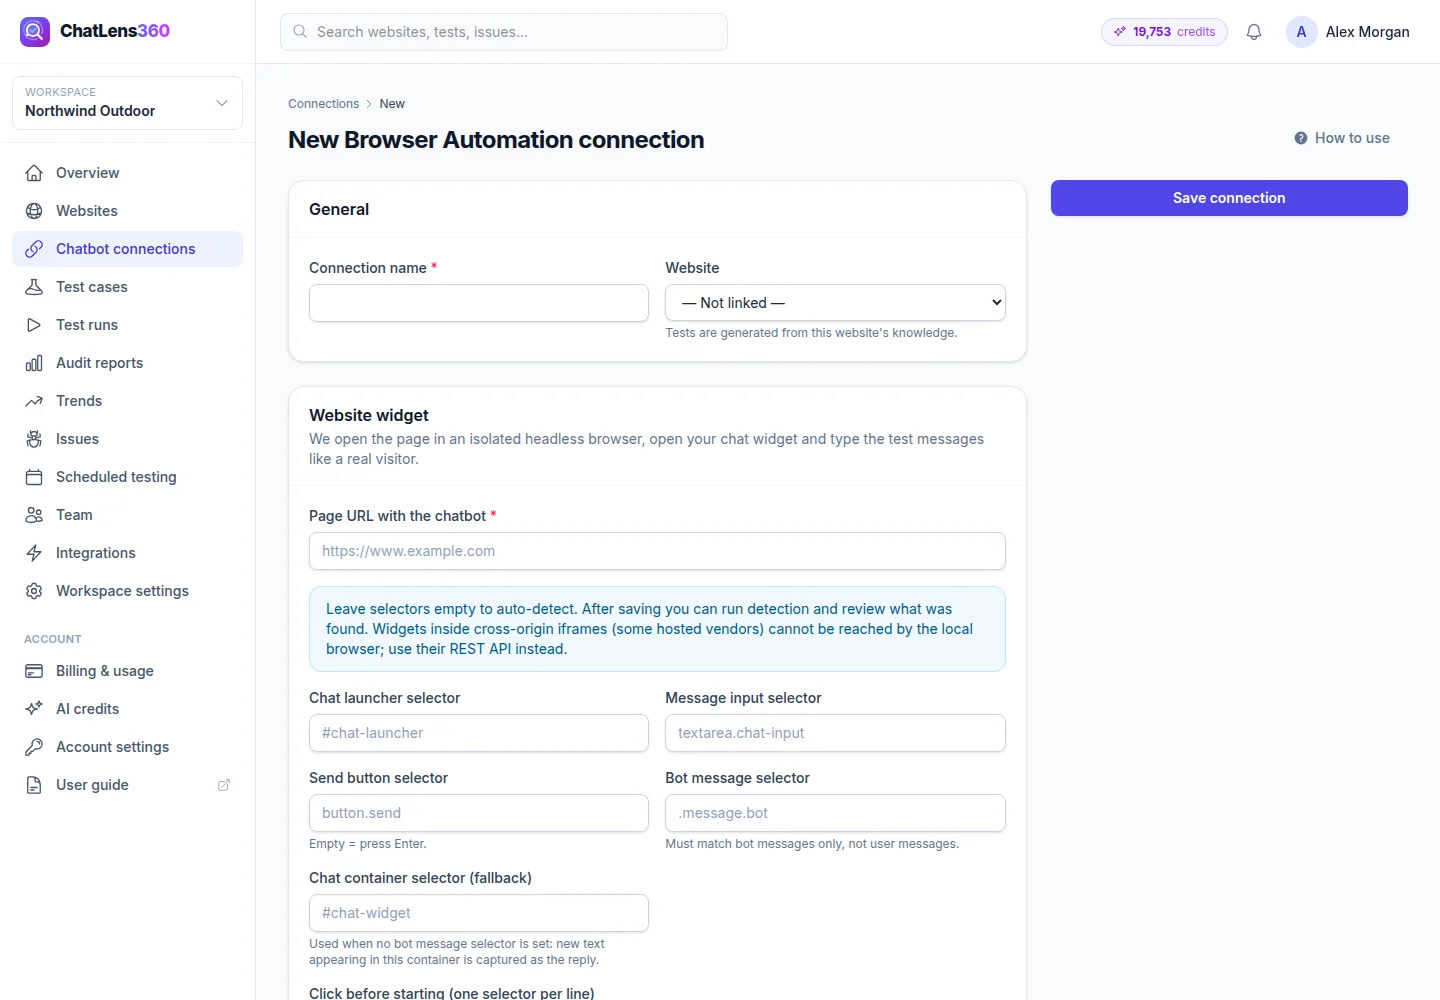
Choose Browser Automation. We open your page in an isolated browser, open your chat widget and type the test messages like a real visitor.
- Enter the Page URL with the chatbot.
- Leave the selector fields empty to let us detect the widget automatically. You can fill them in later if detection needs help: Chat launcher selector, Message input selector, Send button selector and Bot message selector.
- If a cookie banner covers the page, add its accept button under Click before starting (one selector per line).
- Optionally set Reply timeout (ms), Screenshots and Emulate a mobile device, then click Save connection.
Tip: in the setup wizard, Use my website widget creates this connection for you in one click.
3. Option B: connect a REST API
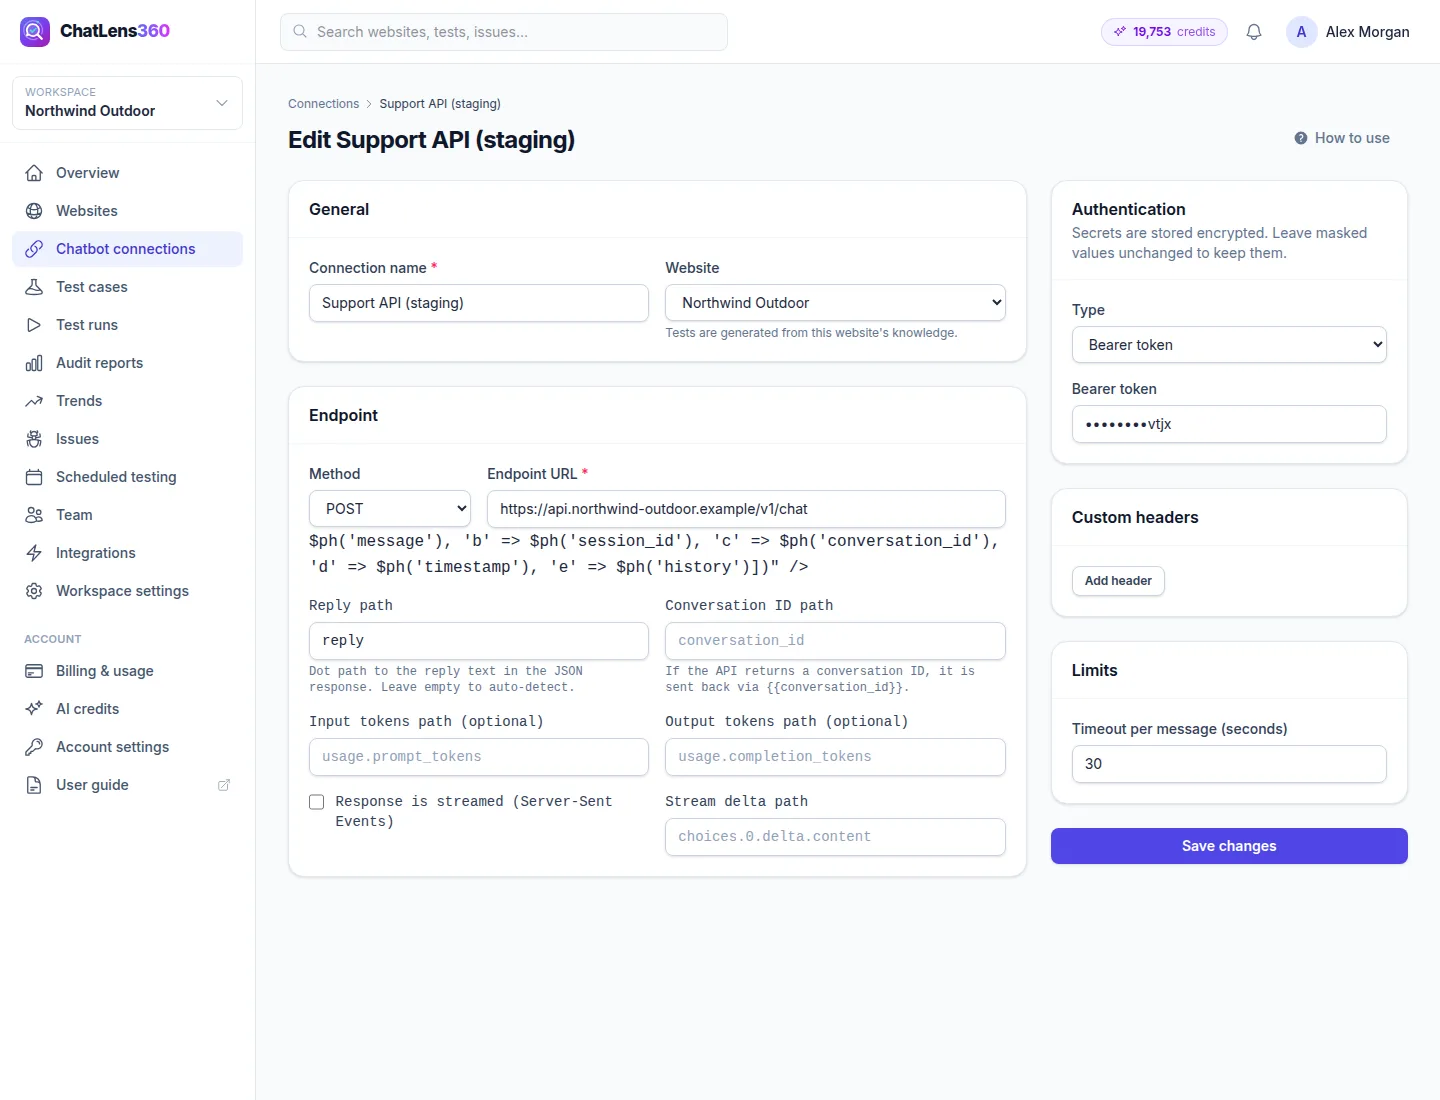
Choose REST API and fill in the Endpoint section:
- Pick the Method (usually POST) and enter the Endpoint URL.
- In Request body template (JSON), write the body your API expects with
{{message}}where the user's message goes.{{session_id}},{{conversation_id}},{{timestamp}}and{{history}}are also available. - Set Reply path to the reply text in the response, for example
data.reply, or leave it empty to auto-detect. If your API returns a conversation ID, enter its Conversation ID path. - If replies are streamed, tick Response is streamed (Server-Sent Events).
- Under Authentication, choose None, Bearer token, API key or Basic auth and enter the credentials. Add any Custom headers, then click Save connection.
4. Option C: connect an MCP server
Choose MCP Server, enter the Server URL, the Chat tool name that sends a user message to your assistant, and the Message argument name. Only tools in Allowed tools (comma-separated) can ever be called; by default, just the chat tool. Click Save connection, then Discover tools on the connection page to list your server's tools.
5. Run a connection test
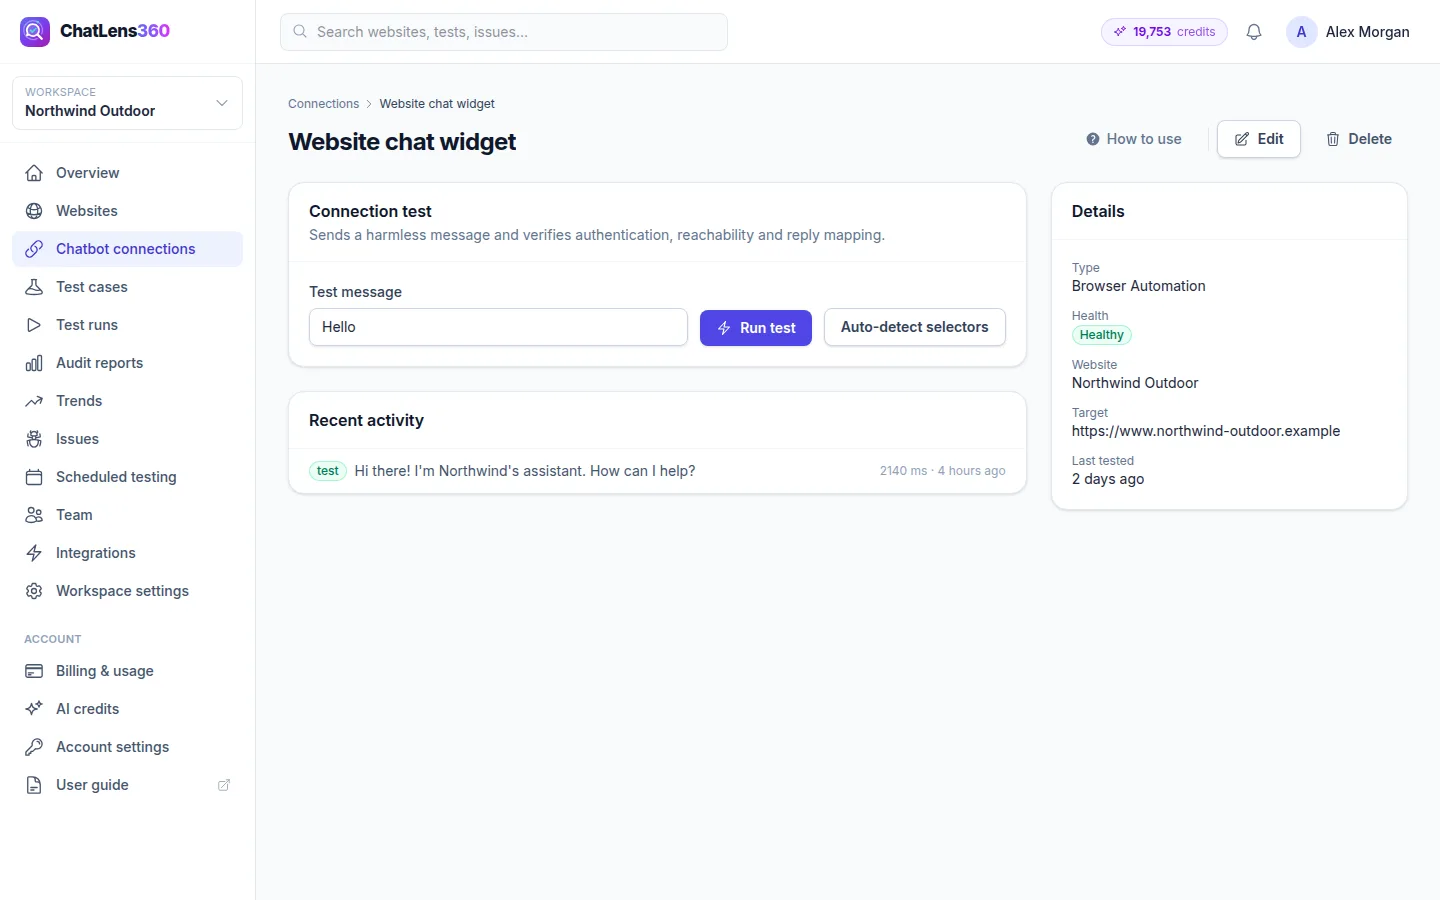
After saving, you land on the connection page. In Connection test, keep the Test message "Hello" or type your own and click Run test. You see whether it worked, the Reply, the Chatbot latency and a redacted sample request and response.
For widget connections, click Auto-detect selectors to see what we found on your page. If the Detected selectors look right, copy them into the connection settings with Edit.
Tips
- Not technical? Start with the website widget. It tests exactly what customers see.
- Use the REST API when you can. It is the fastest and most reliable way to run large audits.
- Use a test or staging API key, not your production admin key.
- Run a connection test after any change to your chatbot, before a scheduled audit runs.
Troubleshooting
- "Check the API key / token and the authentication type." — The chatbot rejected our credentials. Check Authentication and any custom headers.
- "The response arrived but the reply could not be found." — Compare the sample response with your Reply path and correct it, or leave it empty to auto-detect.
- "Check the CSS selectors and that the widget is visible without login." — Run Auto-detect selectors and add any cookie banner button under Click before starting. Some hosted widgets cannot be reached this way; use their REST API instead.
- "The target address is not allowed" — We only connect to public internet addresses, not private networks or localhost.
Related guides
Still stuck? Contact us and we will help, or let our team set it up and fix it for you.