As a superadmin you control how the whole platform behaves: who can sign up, whether the public free chatbot test is open, whether partner links appear, and which AI services power testing. This guide walks through the settings you will change most often.
Before you start
- You need a superadmin account. Superadmins see Superadmin at the bottom of the app sidebar; click it to open the admin panel.
- Changes in Site settings apply immediately to every visitor and customer.
Step by step
1. Open Site settings
In the admin sidebar, click Site settings. The tabs on the left are General, Access & maintenance, Email / SMTP, Social login, SEO defaults, Analytics and Custom scripts. Each tab has its own Save button and shows Settings saved. when it works.
2. Set the basics
On General, set the Site name, Site URL, Support email, contact details, Default timezone, Default language and Currency (ISO), and upload a Logo and Favicon (PNG/ICO/SVG).
3. Control access
Open Access & maintenance:
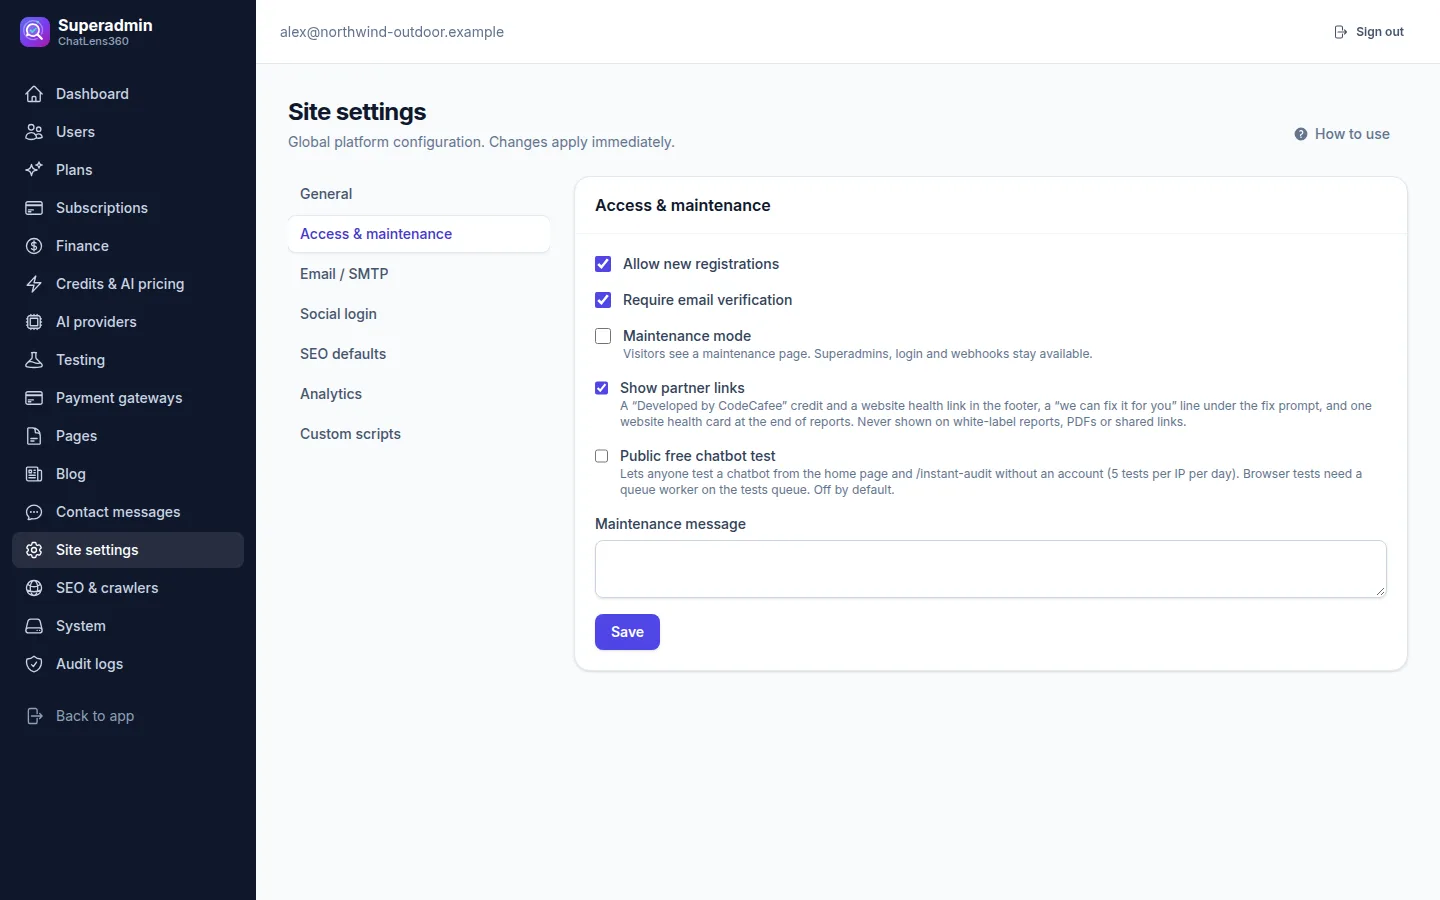
- Allow new registrations: untick to stop new sign-ups.
- Require email verification: new users must confirm their email address before using the app.
- Maintenance mode: visitors see a maintenance page. Superadmins, login and webhooks stay available. Write what visitors should see in Maintenance message.
- Show partner links: see step 4.
- Public free chatbot test: see step 5.
Click Save.
4. Decide on partner links
Show partner links is on by default. It adds:
- a "Developed by CodeCafee" credit and a website health link in the site footer,
- a "we can fix it for you" line under the fix prompt,
- one website health card at the end of reports.
They never appear on white-label reports, PDFs or shared report links. Untick the box to remove them.
5. Turn on the public free chatbot test
Public free chatbot test is off by default. When you turn it on, anyone can test a chatbot from the home page and at /instant-audit without an account, up to 5 tests per visitor per day. While it is off, those pages are not available. See The free public chatbot test for what visitors experience.
Browser-based free tests need the platform's background workers running. Check this with your hosting team before turning the free test on.
6. Configure email, sign-in, SEO and analytics
- Email / SMTP: enter your mail server details. Passwords are stored encrypted; leave the masked value to keep the current one. Use Send a test email to check delivery.
- Social login: enable Google or GitHub sign-in. Copy the Callback URL into the provider's console and paste back the Client ID and Client secret.
- SEO defaults: set the Default meta description, social handle, official profiles and a Default social preview image (1200×630 recommended).
- Analytics: add your measurement, tag manager, verification and pixel IDs. They load on public pages only after a visitor accepts cookies.
- Custom scripts: header and footer snippets for public pages. Only paste code from trusted vendors; every change is recorded in the audit log.
7. Set up AI providers
In the admin sidebar, click AI providers. The Providers tab lists each provider with its default model, health and fallback order.
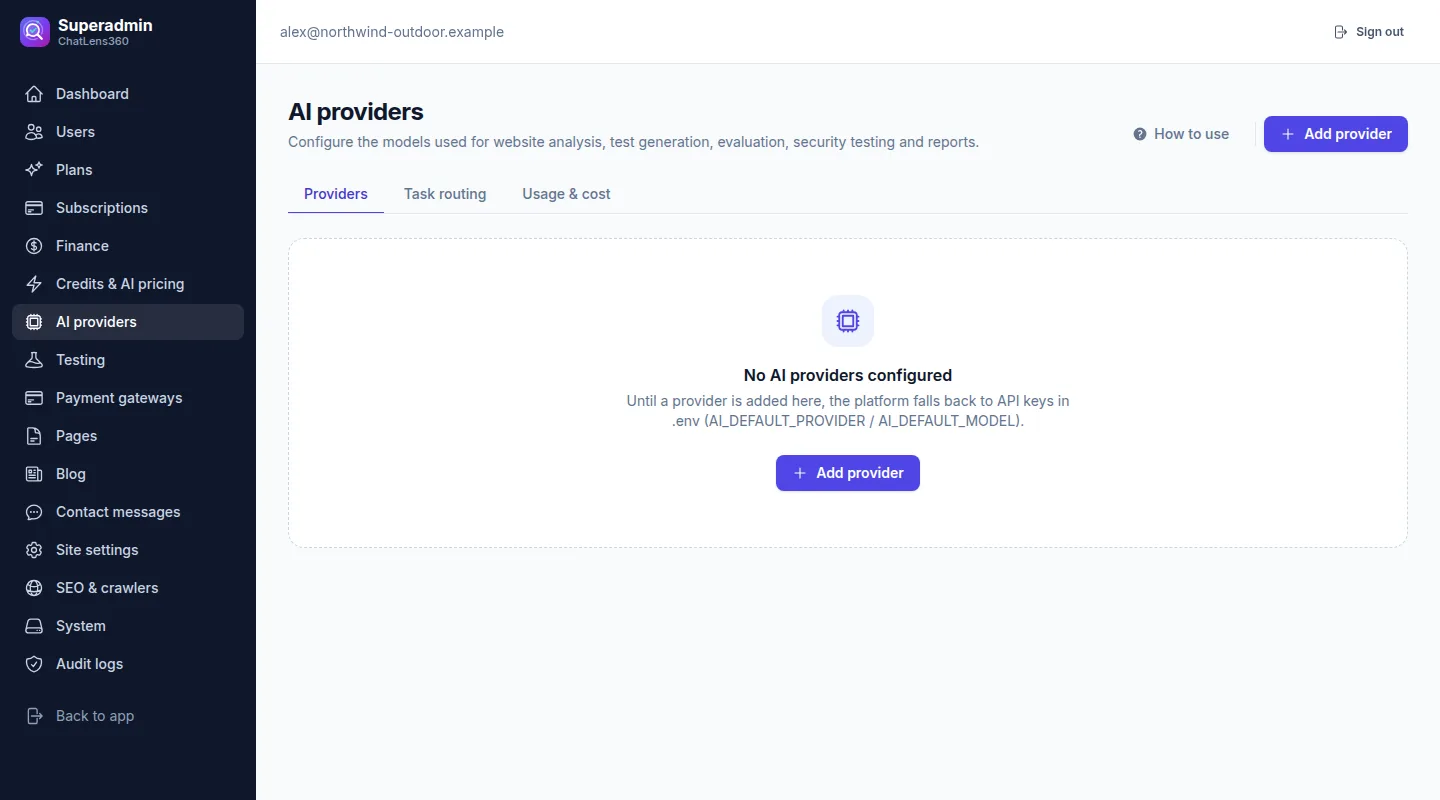
- Click Add provider. Choose the Provider type, enter a Display name and the API key (stored encrypted and never shown again), then click Save provider.
- Add models with their prices under Models & pricing, so usage costs can be estimated, and pick a Default model.
- Click Test connection to send a tiny prompt and confirm it works.
- Use Make default to choose the main provider, and set Fallback order (lower is tried first) for backups.
On the Task routing tab, choose which provider and model handles each platform task, or leave a task on Default provider. Click Save routing. The Usage & cost tab shows calls, tokens and estimated cost by task and model.
Tips
- Turn on the free test when you start marketing: it lets visitors see value in a minute and leads naturally to a free account.
- Add at least two AI providers with a fallback order, so audits keep running if one service has an outage.
- Check Usage & cost weekly against your credit prices to make sure your margins hold.
Troubleshooting
- The free test page shows "not found": Public free chatbot test is off. Turn it on in Access & maintenance and click Save.
- Free tests stay on "Starting a browser": the background workers for tests are not running. Ask your hosting team to start them.
- A provider's health shows a problem: open it, check the API key, then click Test connection.
Related guides
Still stuck? Contact us and we will help, or let our team set it up and fix it for you.