A schedule runs a full audit of your chatbot automatically, so you find out when an answer goes wrong before your customers do. Set it up once and you get a fresh report every month (or more often), plus an email when quality drops.
Before you start
- You need the Owner, Admin or Manager role in the workspace to create or edit schedules. Testers and Viewers can see schedules but not change them.
- Add a website and connect your chatbot first: see Add your website and Connect your chatbot.
- Monthly schedules are available on plans that include monthly scheduling. Weekly, daily and custom schedules are available on plans that include them.
- Each scheduled audit counts toward your plan's scheduled audits and needs a positive AI credit balance to start. See Plans, billing and AI credits.
Step by step
1. Open Scheduled testing
In the left sidebar, click Scheduled testing. The page lists every schedule in the workspace with its Frequency, Next run, Last result and Status (Active or Paused).
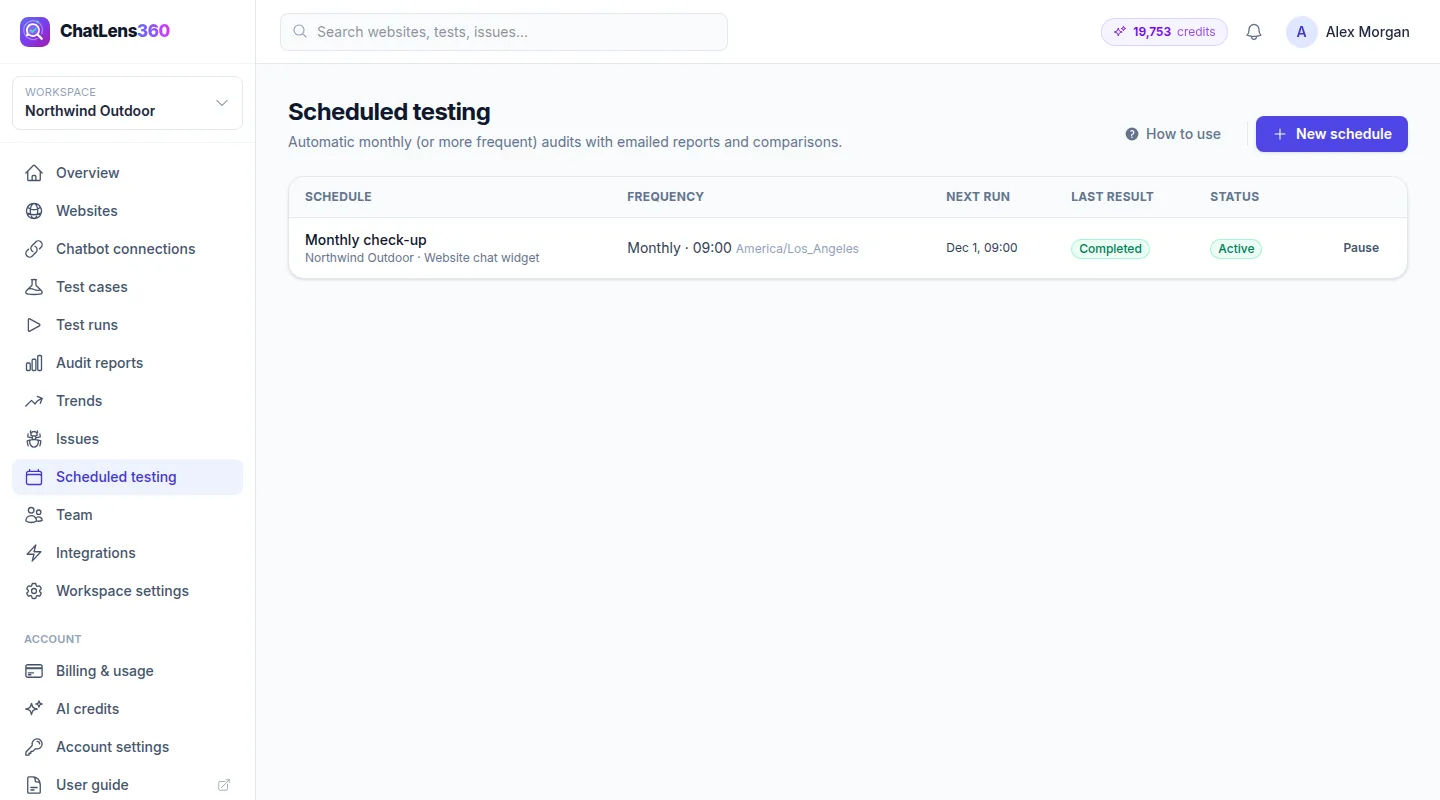
Click New schedule at the top right (or Create schedule if you have none yet).
2. Choose what to test
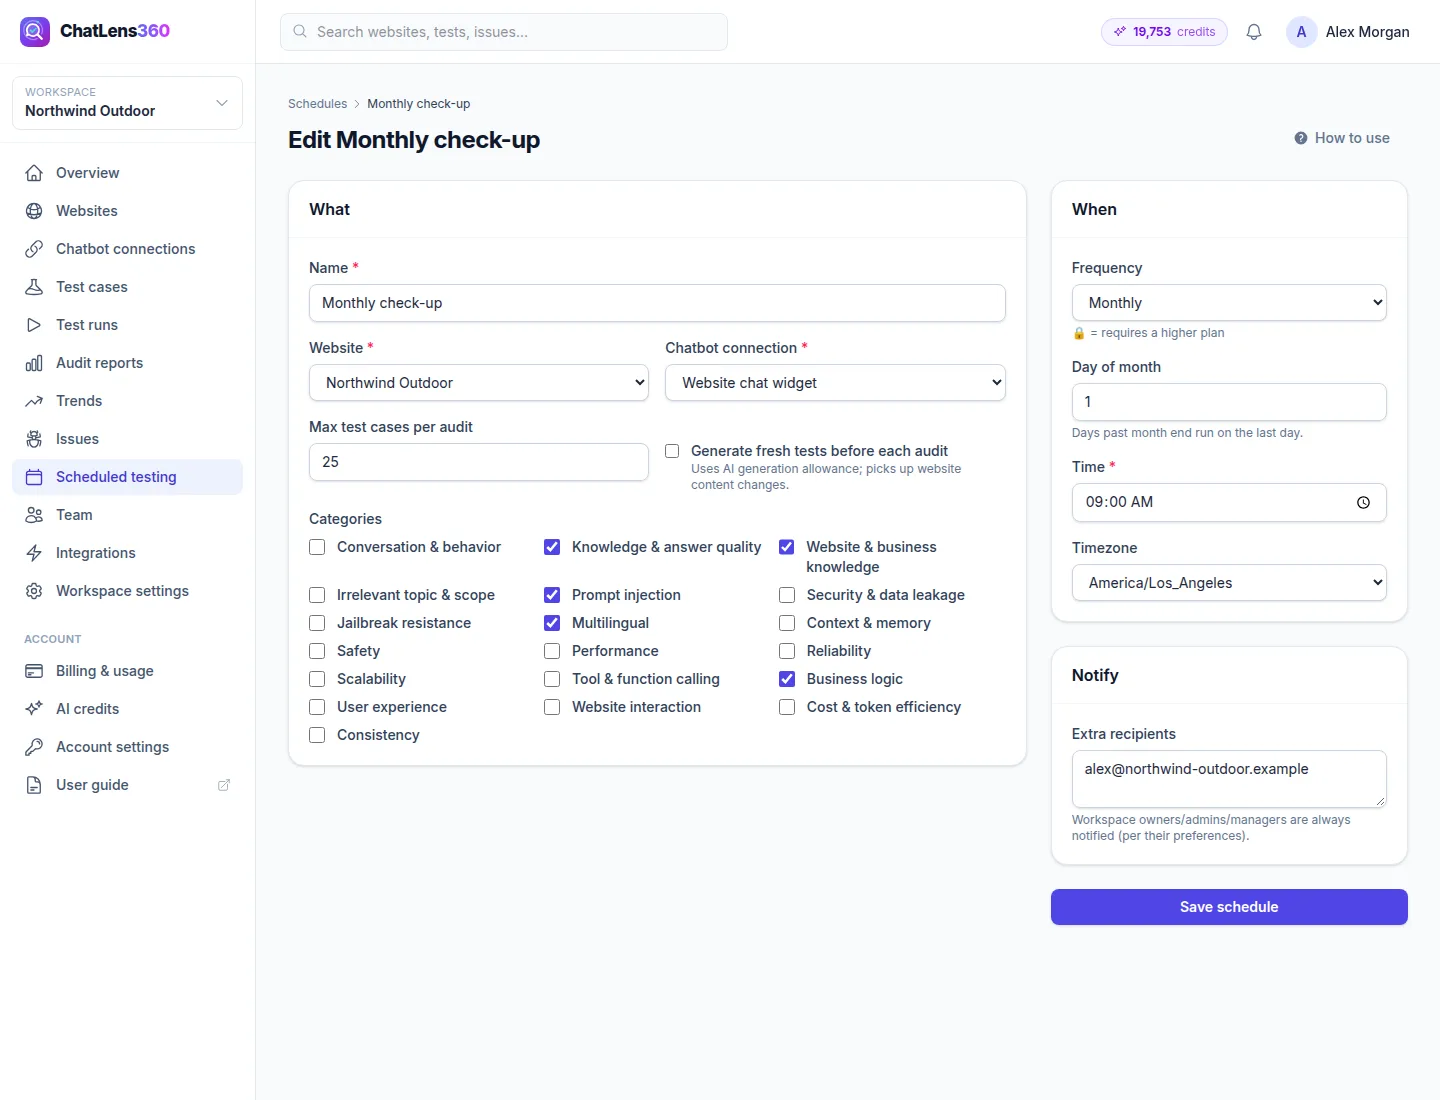
In the What card, fill in:
- Name: something you will recognize in emails, for example "Monthly chatbot audit".
- Website and Chatbot connection: the site whose facts are used for checking, and the chatbot to test.
- Max test cases per audit: the upper limit on how many questions each audit asks.
- Generate fresh tests before each audit: tick this if your website changes often. New questions are written from your latest content before each run. This uses your AI generation allowance.
- Categories: pick at least one area to test, such as knowledge, business rules or security.
3. Choose when it runs
In the When card, pick a Frequency: Monthly, Weekly, Daily or Custom. Options marked with a lock are not included in your current plan.
- Monthly: set Day of month. Days past the end of a short month run on the last day.
- Weekly: set Day of week.
- Custom: set Every N days (2 to 90).
Then set the Time and Timezone. The timezone defaults to your workspace timezone.
4. Choose who gets notified
In the Notify card, add any Extra recipients, separated by commas (up to 10 addresses). Workspace owners, admins and managers are always notified, according to their own email preferences.
5. Save and check the next run
Click Create schedule. A confirmation shows the date of the next audit, and the schedule page opens.
The Execution history table lists every run with its Scheduled for time, Status, a link to the Audit, the Score and a Message explaining what happened.
6. Run, pause, edit or delete
From the schedule page you can:
- Click Run now to start an audit immediately. It appears under Test runs in a moment.
- Click Pause to stop future runs, and Resume to restart them. You can also pause or resume straight from the list.
- Click Edit to change any setting, or Delete to remove the schedule.
7. Set up your alerts
Open Account settings from the user menu and find Email notifications. Make sure these are ticked:
- Audit completed / monthly report available
- Critical issue discovered
- Health score decreased / regression detected
- Audit failed
You get a score-drop alert when the health score falls by 5 points or more compared with the previous audit, or when questions that used to pass now fail.
Tips
- Start with a monthly schedule on the categories that matter most to revenue: prices, policies and product facts. Add security categories once those pass.
- Turn on Generate fresh tests before each audit if you change prices or policies often, so the audit always checks your latest facts.
- Add your agency or chatbot vendor as an extra recipient so the person who can fix problems hears about them first.
- Check Trends after a few runs to see whether your fixes are holding.
Troubleshooting
- The run shows "skipped" with "No AI credits left": buy extra credits or renew your plan on the AI credits page. The next scheduled audit runs automatically.
- The message says your current plan no longer includes this frequency: the schedule was paused. Upgrade, or edit the schedule to use a frequency your plan includes, then click Resume.
- "Chatbot connection check failed": your chatbot did not respond when the audit started. Open the connection, fix it and click Run now to try again.
- "Website or chatbot connection no longer exists": one of them was deleted. Edit the schedule and pick a current website and connection.
Related guides
Still stuck? Contact us and we will help, or let our team set it up and fix it for you.