Workspaces keep websites, chatbots, reports and people separate, for example one per brand or per client. Inside each workspace you invite teammates and give each one a role, so everyone can do their job without being able to change things they should not.
Before you start
- To invite people or change roles you need the Owner or Admin role in the workspace.
- The number of team members per workspace, and the number of workspaces you can own, depend on your plan. See Plans, billing and AI credits.
- Your plan applies to every workspace you own, and limits are counted against the workspace owner's plan.
Step by step
1. Create or switch workspaces
The workspace switcher sits at the top of the left sidebar, showing Workspace and the current name. Click it to switch to another workspace, or click New workspace to create one.
On the Create a workspace page, enter a Workspace name, an optional Description, and choose a Timezone and Language. Click Create workspace.
2. Open the Team page
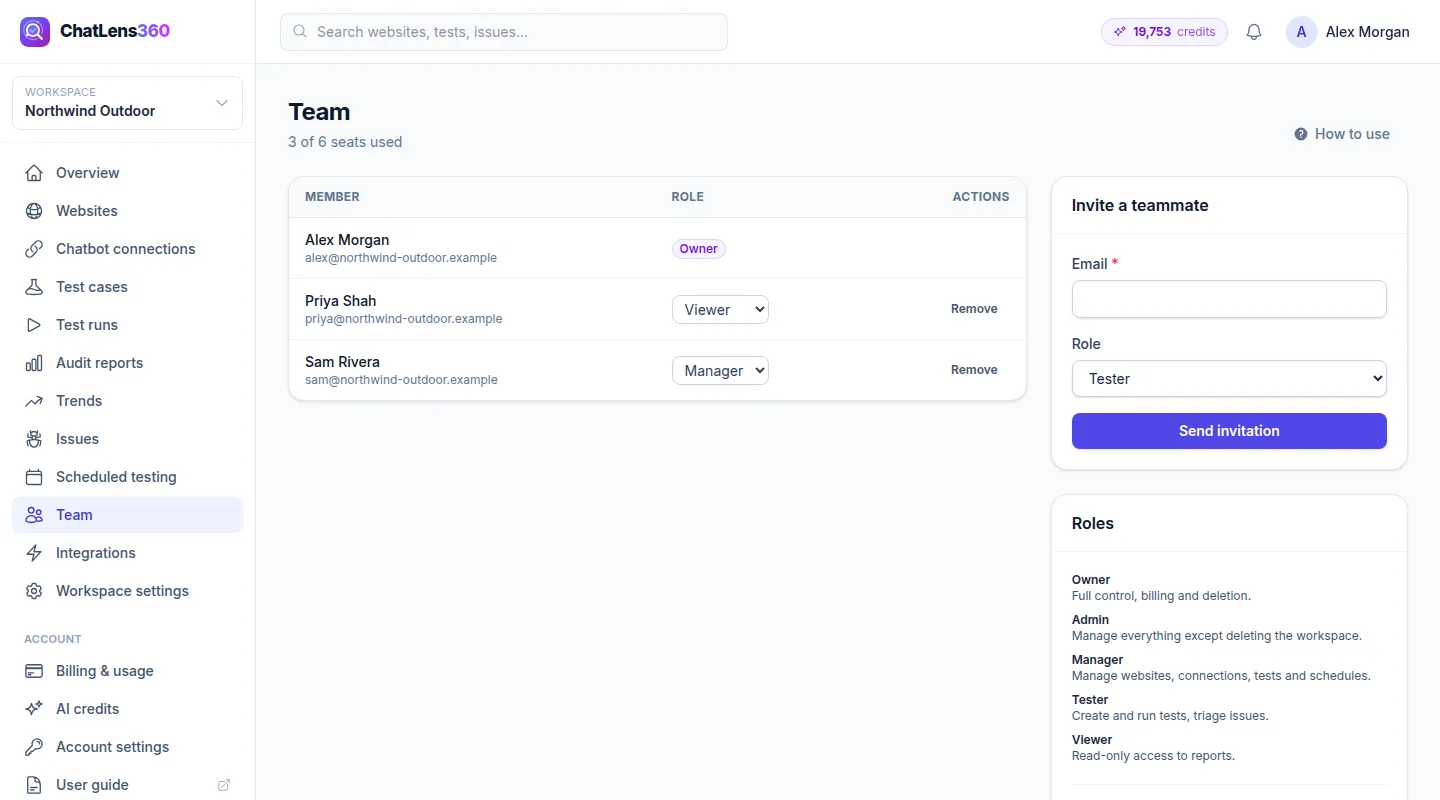
In the left sidebar, click Team. The header shows how many seats are used out of your plan's limit, and the table lists every Member with their Role.
3. Pick the right role
The Roles card explains each role:
- Owner: full control, billing and deletion. Each workspace has one owner.
- Admin: manage everything except deleting the workspace, including team members and integrations.
- Manager: manage websites, connections, tests and schedules.
- Tester: create and run tests, triage issues.
- Viewer: read-only access to reports.
4. Invite a teammate
In the Invite a teammate card, enter their Email, choose a Role (Tester is selected by default) and click Send invitation.
They receive an email with a link to join. The invitation appears under Pending invitations with its expiry; invitations last 7 days. Click Cancel next to an invitation to withdraw it. Pending invitations count toward your seat limit.
Your teammate must accept the invitation while signed in with the same email address it was sent to.
5. Change a role or remove someone
To change a role, pick a new one from the drop-down next to the member's name. It saves immediately.
To remove someone, click Remove in their row and confirm. Any member can leave a workspace with Leave, except the owner.
6. Transfer ownership
If you are the owner, use Transfer ownership at the bottom of the Roles card. Choose a member and click Transfer. You become an admin, and the new owner takes over billing and deletion rights.
7. Update workspace settings and branding
In the left sidebar, click Workspace settings. In General & branding you can change the Workspace name, Description, Timezone and Report language, and upload a logo.
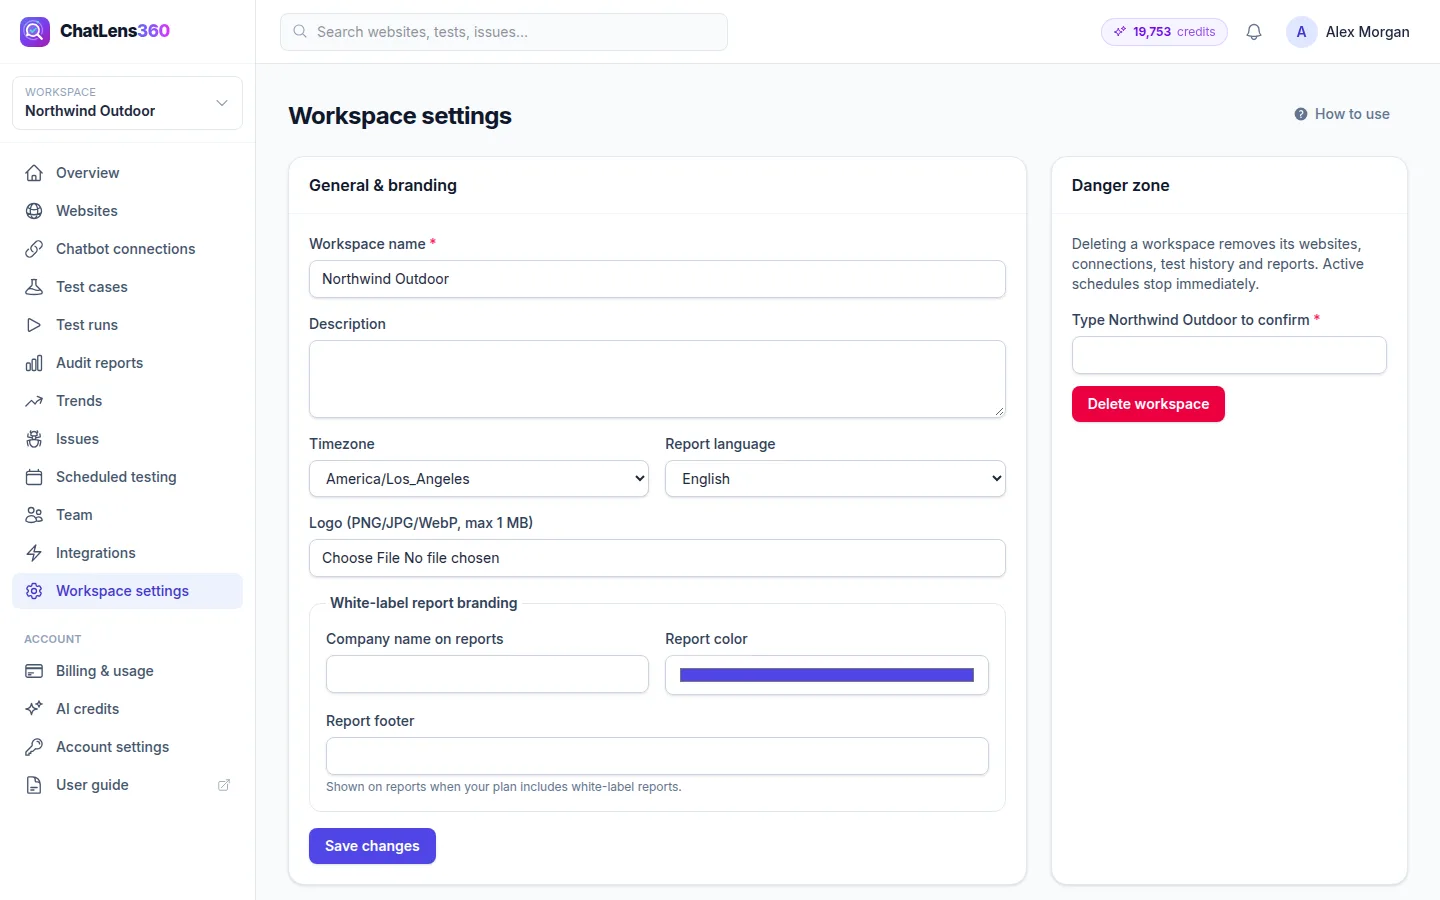
Under White-label report branding, set the Company name on reports, Report color and Report footer. These are shown on reports when your plan includes white-label reports. Click Save changes.
The owner also sees a Danger zone with Delete workspace. Deleting removes the workspace's websites, connections, test history and reports, and stops active schedules immediately. To confirm, type the workspace name exactly.
Tips
- Agencies: create one workspace per client. Each client's reports, branding and team stay separate, and you can switch between them in one click.
- Give your chatbot vendor or developer the Tester role, so they can run tests and triage issues without access to billing or team settings.
- Give managers and executives the Viewer role so they can read reports without changing anything.
- Set the workspace timezone to where your team works, so schedules and dates match your working day.
- Before someone leaves your company, transfer ownership of any workspace they own.
Troubleshooting
- "This person is already a member of the workspace.": they already have access. Change their role in the table instead.
- "Your plan allows ... team members per workspace. Upgrade your plan to add more.": remove a member, cancel a pending invitation, or upgrade.
- "This invitation has expired or was already used.": send a new invitation from the Team page.
- "This invitation was sent to a different email address.": the invitee is signed in with another account. They should sign out and sign in (or register) with the invited address.
Related guides
Still stuck? Contact us and we will help, or let our team set it up and fix it for you.